Arch Linux安装教程!
为什么使用Arch?
- 优点 定制属于你自己的Linux操作系统 …
- 优点 没有预装垃圾 …
- 优点 纯粹社区基因不和企业等挂钩 …
- 优点 滚动更新,一切永远保持最新
- 优点 上游软件大多几乎原汁原味 …
- 优点 Arch Wiki 无敌,其他Linux发行版遇到的问题也可以借鉴 …
- 优点 AURArch 用户专属软件库 …
适合你吗?
- 缺点 安装它并非那么容易 …
- 缺点 需要折腾 …
- 缺点 过于激进的更新可能损坏系统,不过也可以滚回去 …
- 缺点 并不适合做为生产服务器 …
支持的架构?
目前主要支持amd64
正式开始安装.
必须的硬件.
- U盘 2GB足矣.
- 网络 可靠的网络连接.
0.制作UEFI-USB启动盘,并更改UEFI启动引导顺序.
下载Arch iso镜像.
这里选择香港服务器.
https://asia.mirror.pkgbuild.com/iso
http://mirror-hk.koddos.net/archlinux/iso
https://mirror-hk.koddos.net/archlinux/iso
http://hkg.mirror.rackspace.com/archlinux/iso
https://hkg.mirror.rackspace.com/archlinux/iso
https://arch-mirror.wtako.net/iso
http://mirror.xtom.com.hk/archlinux/iso
https://mirror.xtom.com.hk/archlinux/iso
烧录ISO到U盘
推荐使用下列软件.
更改UEFI启动引导顺序,禁用Secure Boot,设置USB为第一引导项.
1.基本系统的构建.
如果不出意外你一定已经进入了Arch iso的系统中.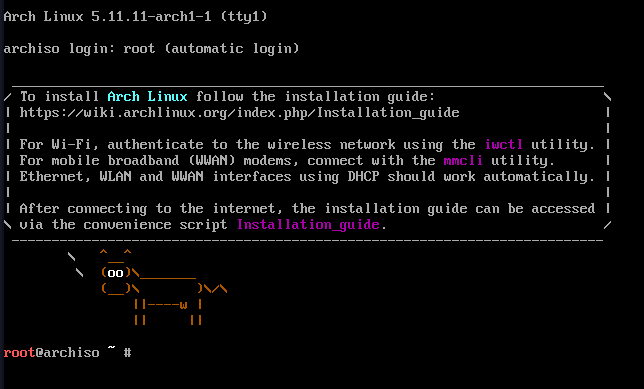
看起来字体有点小,更改方法;
setfont /usr/share/kbd/consolefonts/sun12x22.psfu.gz2.连接网络,这里主要教如何连接WiFi。
使用iwcd连接加密方式为WPA-WPA2-PSK
使用iwcd
[root@archiso~] iwctl
[iwd#]
# 在[iwd#]中输入device list查询机器的网卡设备
[iwd#] station <devicename> scan # 查询附近可用的wifi网络

[iwd#] station <devicename> get-networks # 显示扫描的结果
输入station <devicename> connect <wifi-ssid>连接wifi网络,如果wifi加密,会提示你输入密码。使用wpa_supplicant连接加密方式为WPA-WPA2-PSK的WiFi.
iwlist 网卡名 scan |grep 'ESSID'        #扫描附近的WiFi;
wpa_passphrase wifi名 wifi密码 > /tmp/wifi.conf    #生成wpa_supplicant链接wifi的配置文件;
wpa_supplicant -i 无线网卡名 -c /tmp/wifi.conf      #连接WiFi;
ping -c 3 baidu.com #测试网络连接;连接不加密的WiFi.
iw dev 网卡名 connect wifi名字3.磁盘分区,构建基本系统.
首先修改一些配置文件.
/etc/pacman.conf #配置pacman输出颜色支持;
/etc/pacman.d/mirrorlist #配置源,大陆就选择大陆内,保证速度最快;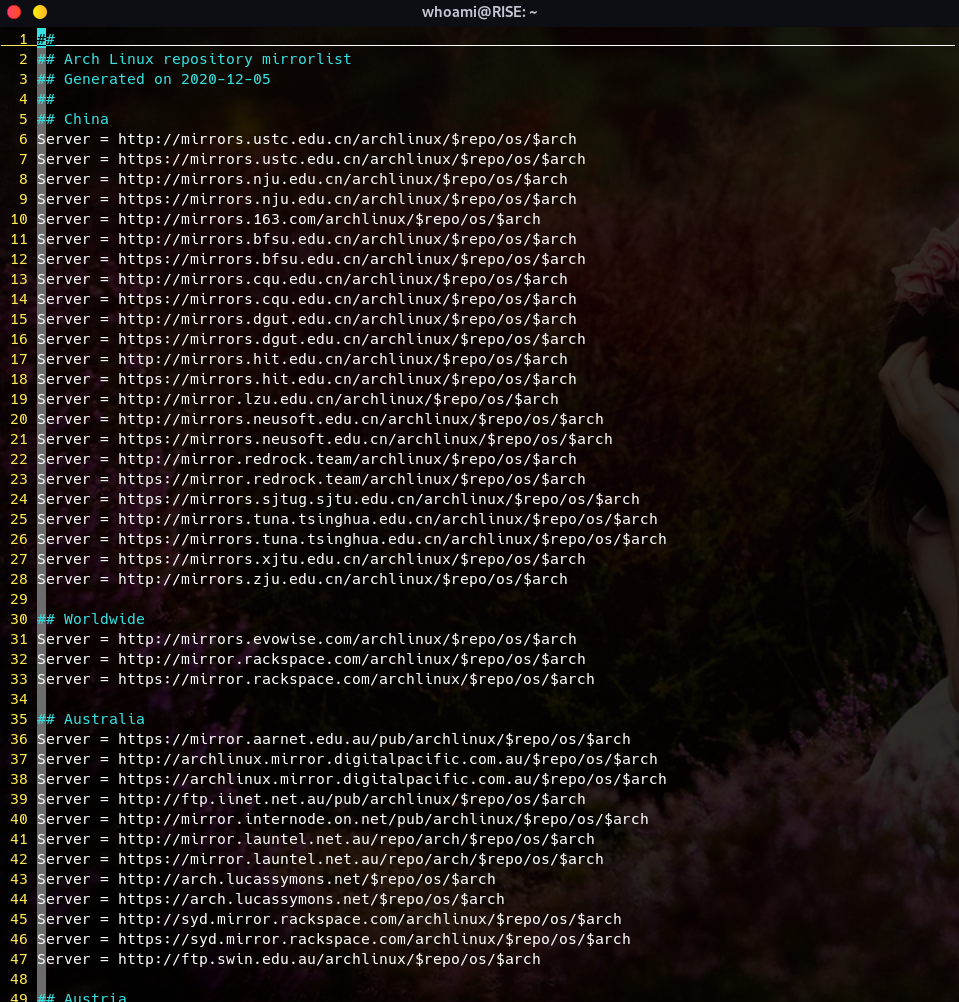
分区
==================================================================
root@archiso ~ # lsblk -a       #列出所有可用块设备的信息;
NAME    MAJ:MIN RM   SIZE RO TYPE MOUNTPOINT
loop0     7:0    0 618.3M  1 loop /run/archiso/airootfs
sr0      11:0    1 750.3M  0 rom  /run/archiso/bootmnt
nvme0n1 259:0    0   100G  0 disk       #这是我们要安装的磁盘;
==================================================================
root@archiso ~ # fdisk /dev/nvme0n1     #使用fdisk对磁盘进行分区;

Welcome to fdisk (util-linux 2.36.2).
Changes will remain in memory only, until you decide to write them.
Be careful before using the write command.


Command (m for help): g             #分区表设置为GPT;
Created a new GPT disklabel (GUID: C34129A8-C95C-0A4D-A204-0DC5208BF674).
==================================================================

Command (m for help): n             #建立Boot/EFI分区;
Partition number (1-128, default 1):
First sector (2048-209715166, default 2048):
Last sector, +/-sectors or +/-size{K,M,G,T,P} (2048-209715166, default 209715166): +512M    #容量500MB;

Created a new partition 1 of type 'Linux filesystem' and of size 512 MiB.
==================================================================

Command (m for help): n             #建立SWAP分区;
Partition number (2-128, default 2):
First sector (1050624-209715166, default 1050624):
Last sector, +/-sectors or +/-size{K,M,G,T,P} (1050624-209715166, default 209715166): +8G   #容量8GB;

Created a new partition 2 of type 'Linux filesystem' and of size 8 GiB.
==================================================================

Command (m for help): n             #建立/分区;
Partition number (3-128, default 3):
First sector (17827840-209715166, default 17827840):
Last sector, +/-sectors or +/-size{K,M,G,T,P} (17827840-209715166, default 209715166):      #直接回车将剩余磁盘容量全部给/;

Created a new partition 3 of type 'Linux filesystem' and of size 91.5 GiB.
Partition #3 contains a ext4 signature.

Do you want to remove the signature? [Y]es/[N]o: Y

The signature will be removed by a write command.
==================================================================

Command (m for help): p     #查看分区表;
Disk /dev/nvme0n1: 100 GiB, 107374182400 bytes, 209715200 sectors
Disk model: VMware Virtual NVMe Disk
Units: sectors of 1 * 512 = 512 bytes
Sector size (logical/physical): 512 bytes / 512 bytes
I/O size (minimum/optimal): 512 bytes / 512 bytes
Disklabel type: gpt
Disk identifier: C34129A8-C95C-0A4D-A204-0DC5208BF674
==================================================================

Device            Start       End   Sectors  Size Type
/dev/nvme0n1p1     2048   1050623   1048576  512M Linux filesystem      #Boot/EFI分区;
/dev/nvme0n1p2  1050624  17827839  16777216    8G Linux filesystem      #SWAP分区;
/dev/nvme0n1p3 17827840 209715166 191887327 91.5G Linux filesystem      #/分区;

Filesystem/RAID signature on partition 3 will be wiped.

==================================================================
Command (m for help): w     #保存生效;
The partition table has been altered.
Calling ioctl() to re-read partition table.
Syncing disks.4.格式化分区并激活交换空间
mkfs.fat -F32 /dev/nvme0n1p1    #格式化Boot/EFI分区为FAT32格式,必须是FAT32;
mkfs.ext4 /dev/nvme0n1p3        #格式化/为ext4文件系统;
mkswap -f /dev/nvme0n1p2        #建立交换空间;
swapon /dev/nvme0n1p2 #激活交换空间;5.挂载磁盘分区,安装基本系统
mount /dev/nvme0n1p3 /mnt       #挂载/到mnt下;
mkdir -p /mnt/boot/efi          #建立/boot/efi挂载点;
mount /dev/nvme0n1p1 /mnt/boot/efi  #挂载Boot/EFI分区;
==========================================================
安装基本系统;
pacstrap /mnt base linux linux-headers linux-firmware bash-completion base-devel vim #构建基本系统和基本工具,使用最新的Linux内核;
=================================================================================================================================
pacstrap /mnt base linux-lts linux-lts-headers linux-firmware bash-completion base-devel vim #构建基本系统和基本工具,使用长期支持的,且稳定的lts,Linux内核;
=================================================================================================================================
pacstrap /mnt base linux linux-lts linux-headers linux-lts-headers linux-firmware bash-completion base-devel vim #构建基本系统和基本工具,使用双Linux内核;
=================================================================================================================================
genfstab -U /mnt >> /mnt/etc/fstab #生成fstab;6.使用chroot,配置基本系统
arch-chroot /mnt    #使用chroot将/mnt做为/;
passwd              #设置root密码;
ln -sf /usr/share/zoneinfo/Asia/Shanghai /etc/localtime     #设置时区亚洲,上海;
hwclock --systohc       #同步硬件时钟;
vim /etc/locale.gen     #设置语言en_US_UTF-8 UTF-8
locale-gen              #使得设置生效;
echo 'LANG=en_US.UTF-8' > /etc/locale.conf      #设置语系;
echo 'TEST' > /etc/hostname             #设置主机名;
==============================================================
#配置hosts;
cat << EOF > /etc/hosts
# Static table lookup for hostnames.
# See hosts(5) for details.
127.0.0.1       localhost
127.0.1.1       TEST

# The following lines are desirable for IPv6 capable hosts
::1     ip6-localhost ip6-loopback ip6-TEST
fe00::0 ip6-localnet
ff00::0 ip6-mcastprefix
ff02::1 ip6-allnodes
ff02::2 ip6-allrouters
EOF
7.安装GRUB
#--安装CPU微码请根据自己的CPU选择;
pacman -Sy intel-ucode       #适用与Intel CPU;
pacman -Sy amd-ucode         #适用与AMD CPU;
====================================================
#--基本工具;
pacman -Sy openssh networkmanager   #安装openssh,和NetworkManager网络管理器;
systemctl enable sshd.service       #开机自启ssh;
systemctl enable NetworkManager.service     #开机自启NetworkManager;
#--安装GRUB;
pacman -Sy grub efibootmgr os-prober efivar     #X86_64/EFI Bootloader GRUB;
grub-install --target=x86_64-efi --efi-directory=/boot/EFI --bootloader-id=GRUB  #安装x86-64,EFI,grub;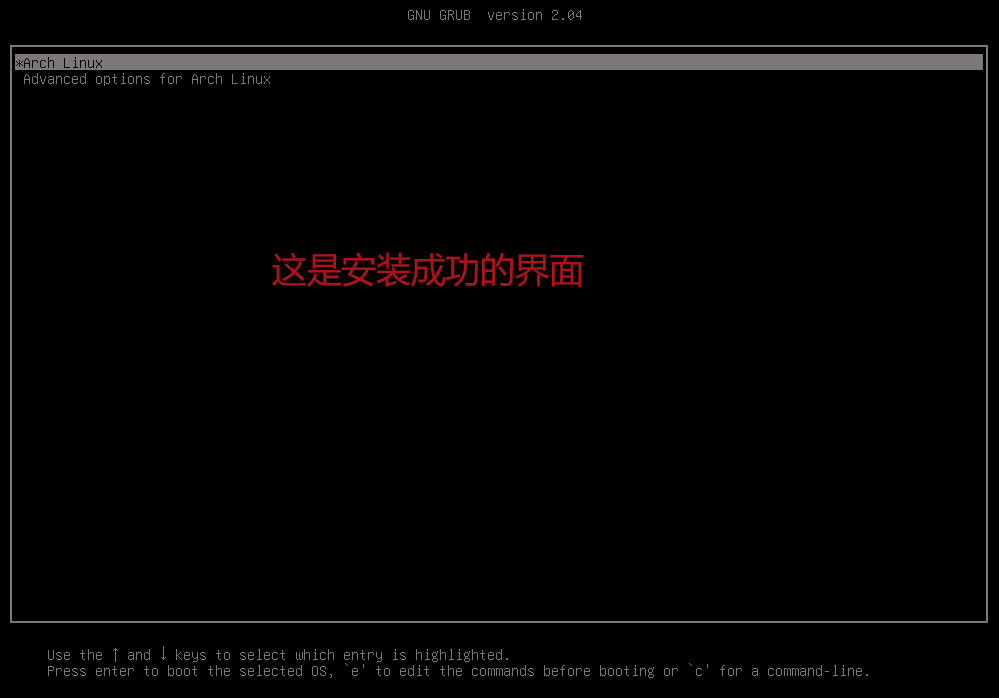
grub-mkconfig -o /boot/grub/grub.cfg #生成grub.cfg文件;严格按照上述步骤重启后你已经可以进入最小化版的Arch Linux系统,
8.安装Gnome桌面
#--建立管理员用户这里假设用户名为Test;
useradd -m -G wheel -s /bin/bash Test
pacman -Sy sudo
#--编辑/etc/sudoers
修改为一下样子:图
#--安装基本工具包;
pacman -Sy neofetch wireless_tools iw net-tools traceroute make gcc dkms cmake pkgconf fakeroot ethtool cifs-utils cheese git
#--安装gnome桌面环境;
pacman -Sy gnome gnome-extra gdm arc-gtk-theme gnu-free-fonts dbus-glib
#--安装中文字体;
#--使能gdm桌面启动管理器开机自启,注意纯独立显卡请不要执行次操作,因为还没有安装显卡驱动,带有集成显卡的用户,可以执行次操作;
systemctl enable gdm.service
9.安装显卡驱动
当你仔细按照上面的操作后,如果你是集显+独显此时已经可以进入图形界面了,又或者你是纯集显此时也可以进入图形界面,如果你是纯独立显卡那么此时你依旧会停留在字符界面,但不要慌张,即将一切ok;
本文围绕Intel集显,NVIDIA独显,以及集显+独显的方式教大家如何安装驱动;
纯NVIDIA独显用户安装显卡驱动
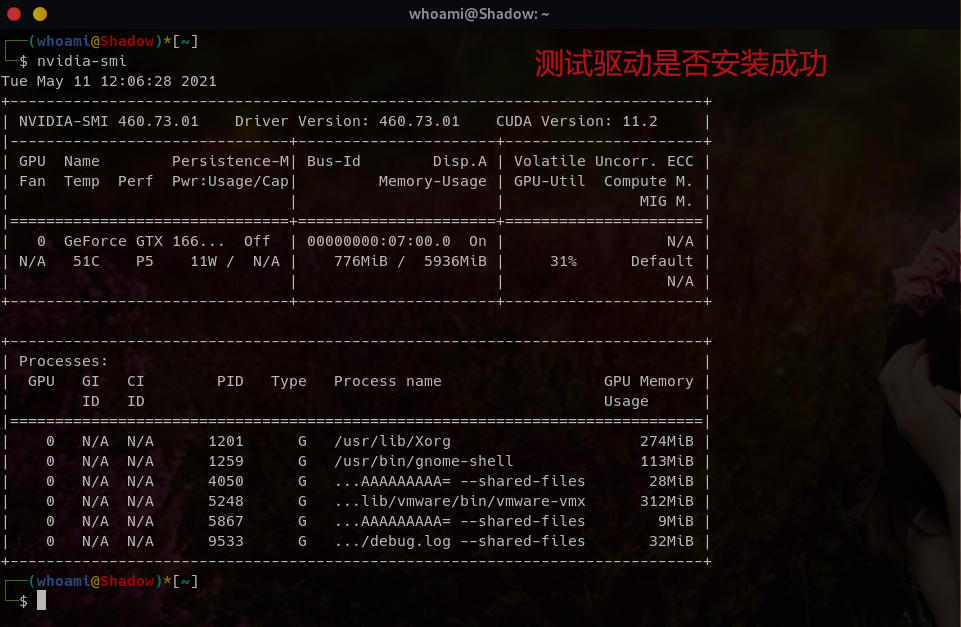
root@TEST ~ # lspci |grep 'VGA'       #查看你的显卡型号,本文中的显卡为GTX1660Ti;
07:00.0 VGA compatible controller: NVIDIA Corporation TU116M [GeForce GTX 1660 Ti Mobile] (rev a1) 下载对应的NVIDNA显卡驱动
echo 'blacklist nouveau' > /etc/modprobe.d/blacklist-nouveau.conf #禁用nouveau;
reboot #重启;
=================================================================
lsmod |grep 'nouveau' #如果什么都没有输出表示已经禁用了nouveau;
=================================================================
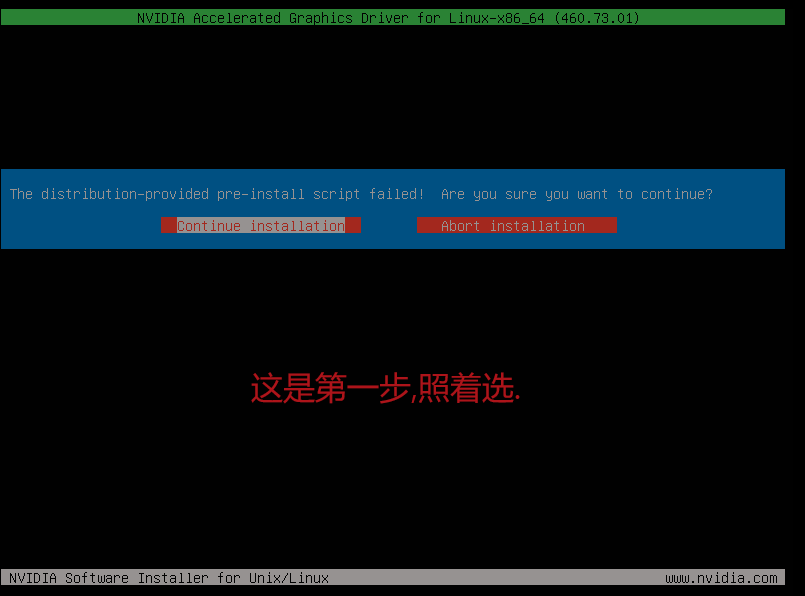
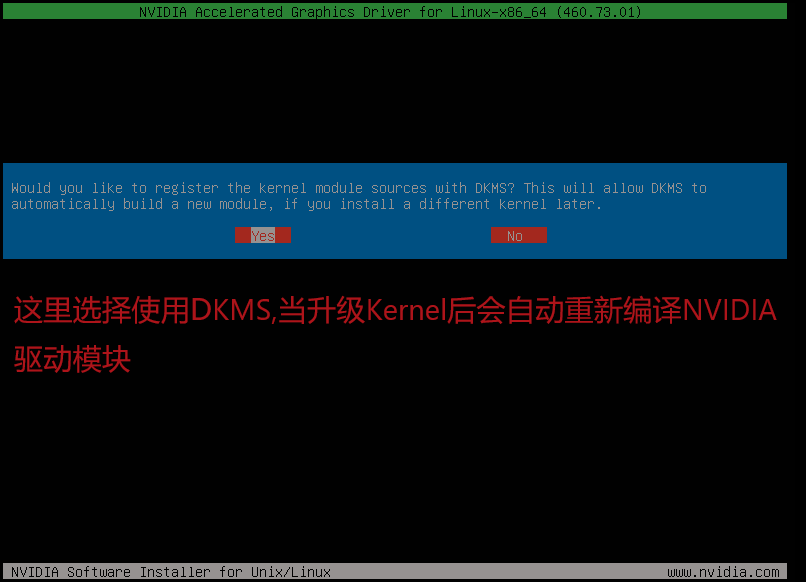
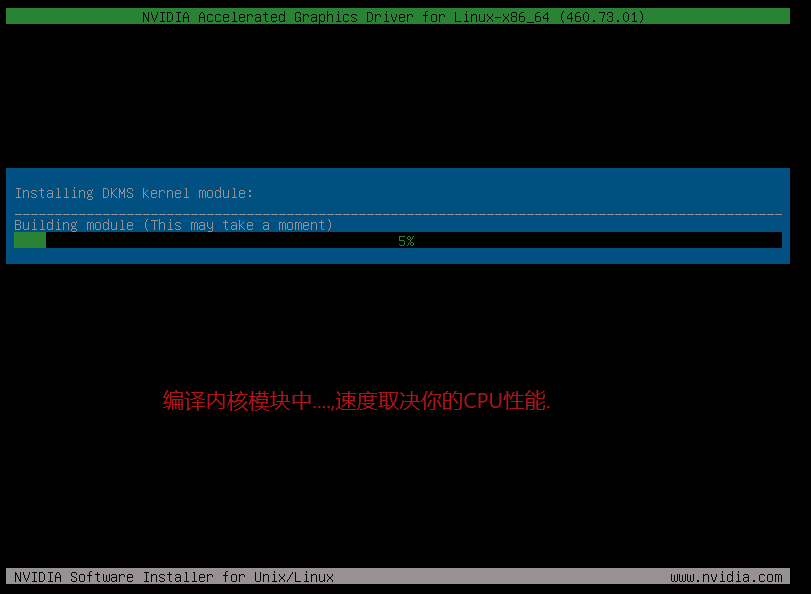
chmod +x N* #给予下载好的run文件执行权限;
./N* #开始安装;如图所示:
核显+独显用户
pacman -S bumblebee bbswitch     #安装大黄蜂,以及自动切换显卡程序;
gpasswd -a username bumblebee    #将用户组添加到bumblebee组中,把username换成自己的用户名
systemctl enable bumblebeed.service   #启动bumblebeed服务;
pacman -S nvidia-dkms nvidia-settings opencl-nvidia lib32-nvidia-utils lib32-opencl-nvidia xf86-video-intel

reboot

pacman -Syy virtualgl   #安装测试软件;
optirun glxspheres64    #运行测试软件;

sudo tee /proc/acpi/bbswitch <<< ON   #开启nvidia显卡;
sudo tee /proc/acpi/bbswitch <<< OFF  #关闭nvidia显卡;
贴出自己的bumblebee配置文件:
/etc/bumblebee/bumblebee.conf #修改配置文件,
## Server options. Any change made in this section will need a server restart
# to take effect.
[bumblebeed]
VirtualDisplay=:8
KeepUnusedXServer=false
ServerGroup=bumblebee
TurnCardOffAtExit=false
NoEcoModeOverride=false
Driver=nvidia
XorgConfDir=/etc/bumblebee/xorg.conf.d

## Client options. Will take effect on the next optirun executed.
[optirun]
Bridge=auto
VGLTransport=proxy
PrimusLibraryPath=/usr/lib/primus:/usr/lib32/primus
AllowFallbackToIGC=false


[driver-nvidia]
KernelDriver=nvidia
PMMethod=auto
LibraryPath=/usr/lib/nvidia:/usr/lib32/nvidia:/usr/lib:/usr/lib32
XorgModulePath=/usr/lib/nvidia/xorg,/usr/lib/xorg/modules
XorgConfFile=/etc/bumblebee/xorg.conf.nvidia

## Section with nouveau driver specific options, only parsed if Driver=nouveau
[driver-nouveau]
KernelDriver=nouveau
PMMethod=bbswith
XorgConfFile=/etc/bumblebee/xorg.conf.nouveau